Automatic Clearing of Centralized Bridged Vendor Payments
A D365 Finance 10.0.48 Sandbox Walkthrough
Organizations running a centralized payment model — one legal entity making payments on behalf of others — have always carried a hidden manual step: every bridge transaction created by a cross-company vendor payment has to be cleared out of the general ledger by hand once the bank confirms the payment. Dynamics 365 Finance 10.0.48 (GA June 2026) closes that gap with a new Cash and bank management feature, Automatic clearing of centralized bridged vendor payments during bank reconciliation. This article documents the end-to-end configuration and a live sandbox test of that feature, run on a 10.0.48 environment.
What the Feature Does
When a legal entity pays a vendor invoice on behalf of another legal entity, the payment posts to a bridging (suspense) account instead of hitting the bank directly. Historically, a cash clerk had to manually post a clearing journal to move that amount into the real bank account once the bank confirmed the transaction. With this feature enabled, that clearing journal is posted automatically — in the centralized payment legal entity — the moment the bank reconciliation worksheet is marked as reconciled. The reconciliation and inquiry pages also expose the related legal entity and party information, so the trail stays auditable across companies.
Step 1: Confirm and Enable the Feature
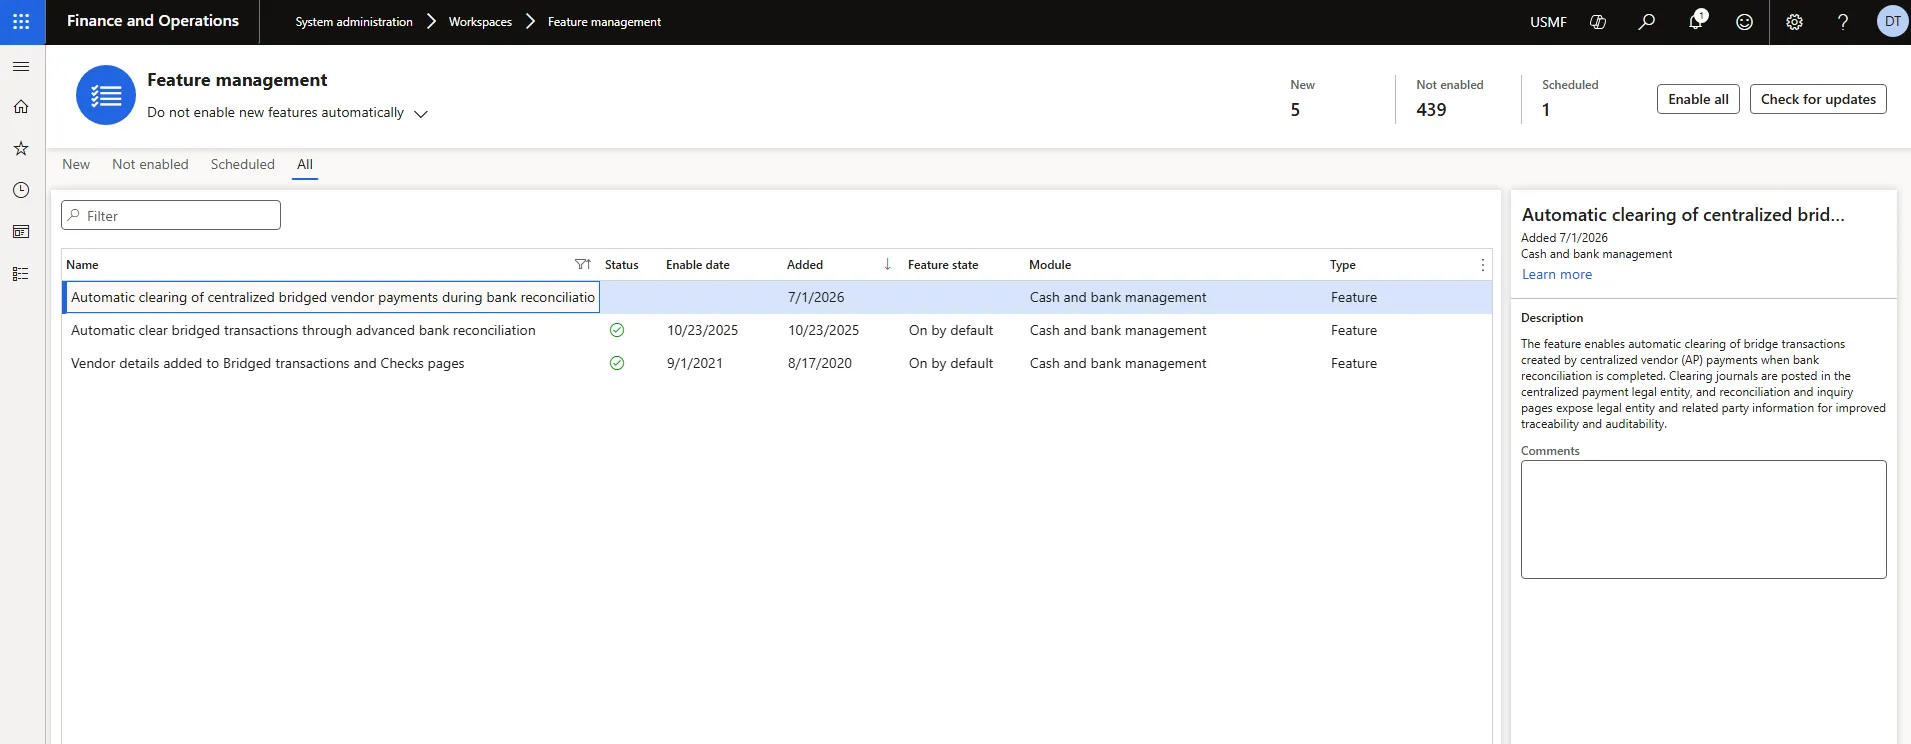
Navigation: Workspaces > Feature management
The feature ships disabled by default (“Enabled by Admin”). Search “bridged” to find it alongside the earlier bridging feature released in 10.0.41 (GA October 2024). That earlier feature is the base for this one — it introduced the “Bridging account by bank account” and “Clear bridged transactions during reconciliation” settings used in Step 3 — so it must remain enabled. The 10.0.48 feature extends that base to centralized payments across legal entities. Select the correct entry and enable it.
Step 2: Set Up Centralized Payments (Prerequisite)
This feature only applies where centralized payments are already active between legal entities. If not already in place, the setup has three parts:
- Organization hierarchy — Create an Organization hierarchy with Purpose set to Centralized payments, including every legal entity that will pay on behalf of another, then publish it.
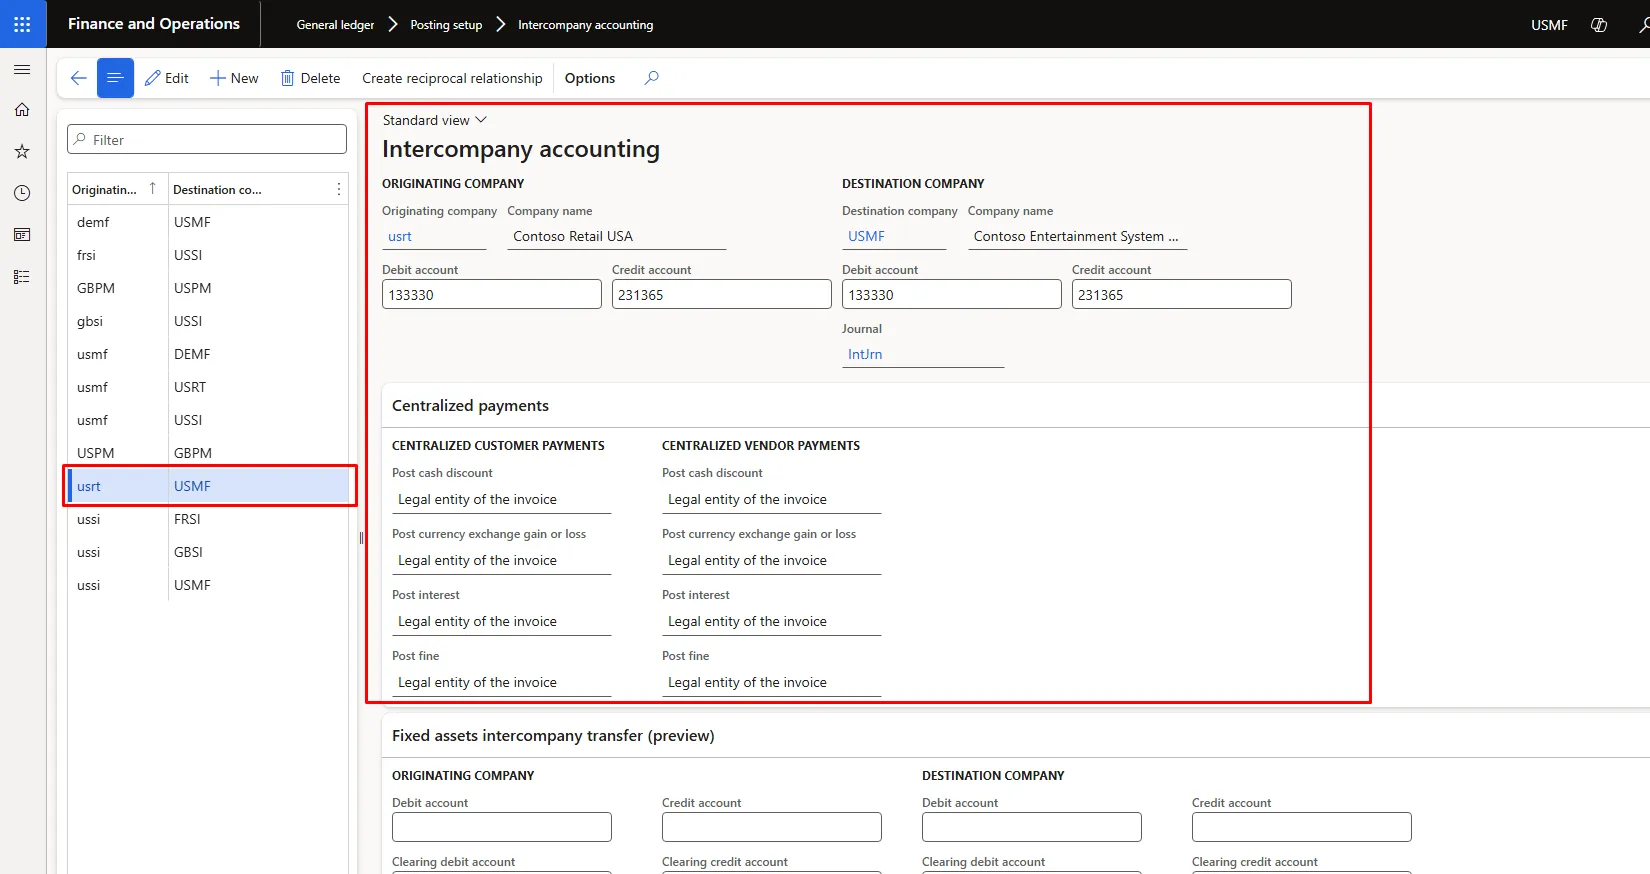
- Intercompany accounting — an Intercompany accounting relationship between each pair of legal entities (Originating → Destination), with Debit/Credit due-to/due-from accounts assigned.
- Centralized payments tab — the Centralized vendor payments section on that same relationship, which controls where cash discounts, exchange gains/losses, interest, and fines post.
Navigation: General ledger > Posting setup > Intercompany accounting
Step 3: Configure Bridging
Bridging posting is what routes the payment to a suspense account instead of the bank. Four settings drive it, across three setup pages:
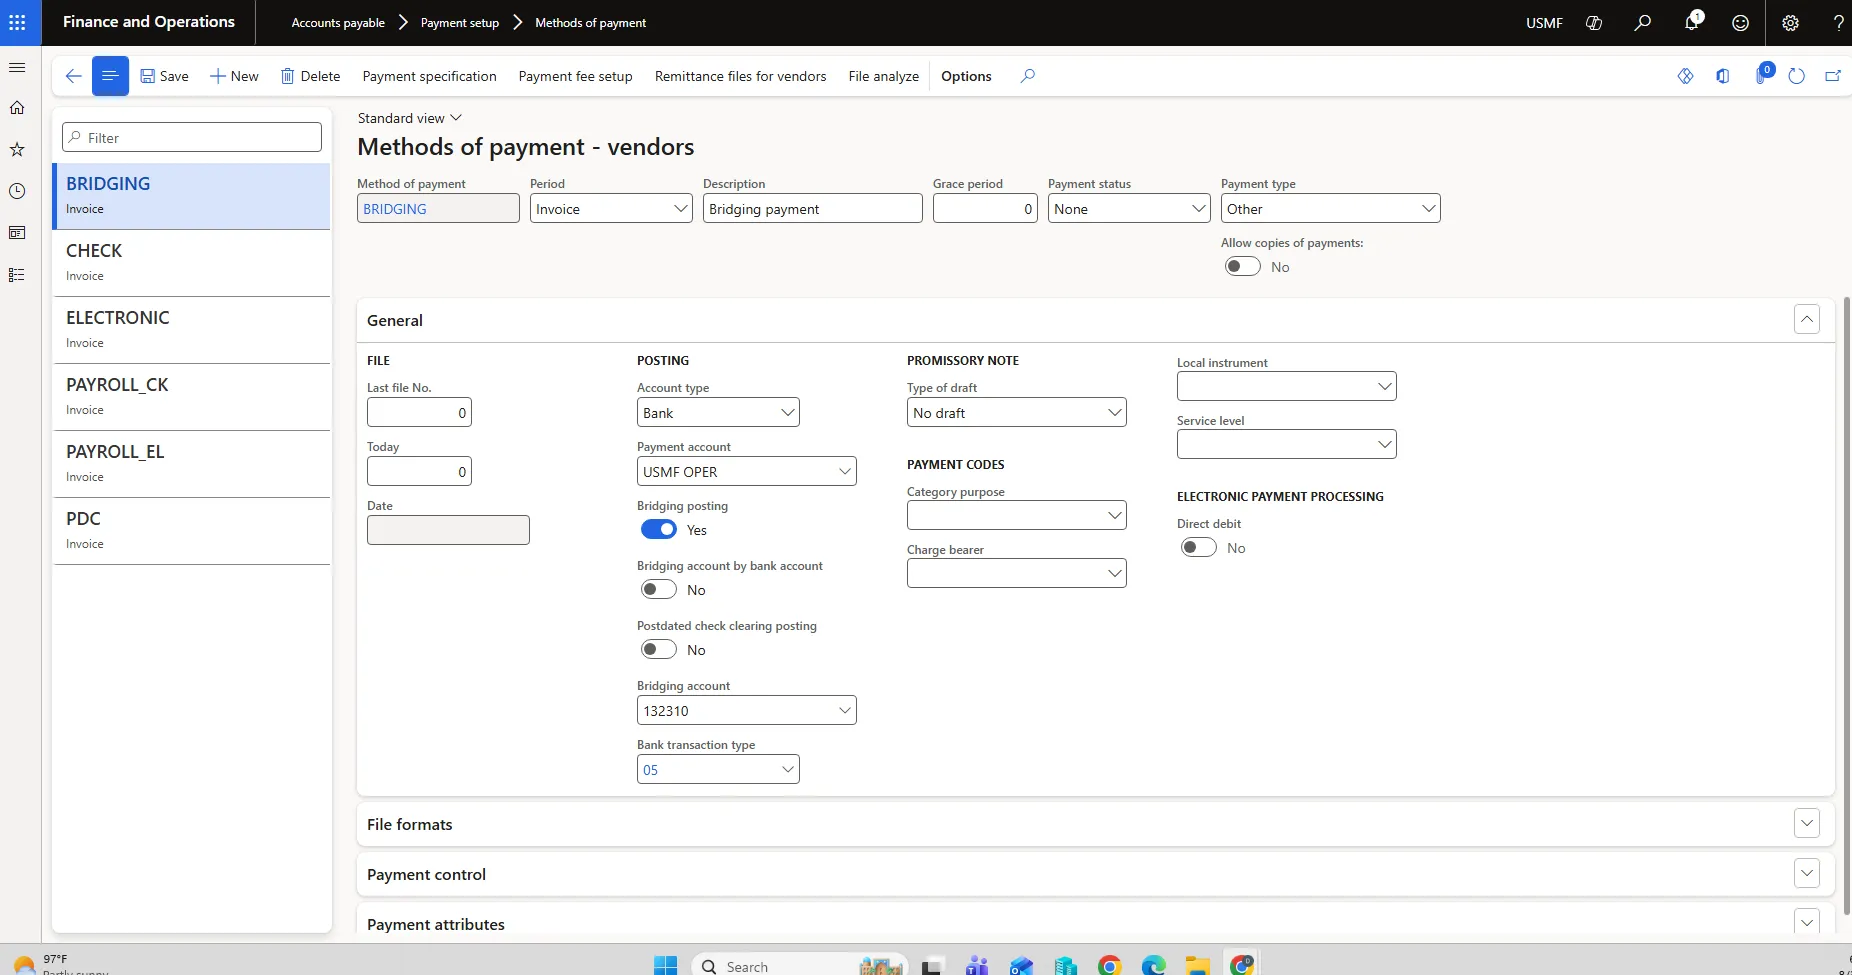
Navigation: Accounts payable > Payment setup > Methods of payment
- Method of payment — On the vendor method of payment used for centralized payments, Bridging posting = Yes, Bridging account = the suspense main account, and Payment account = the real bank account.
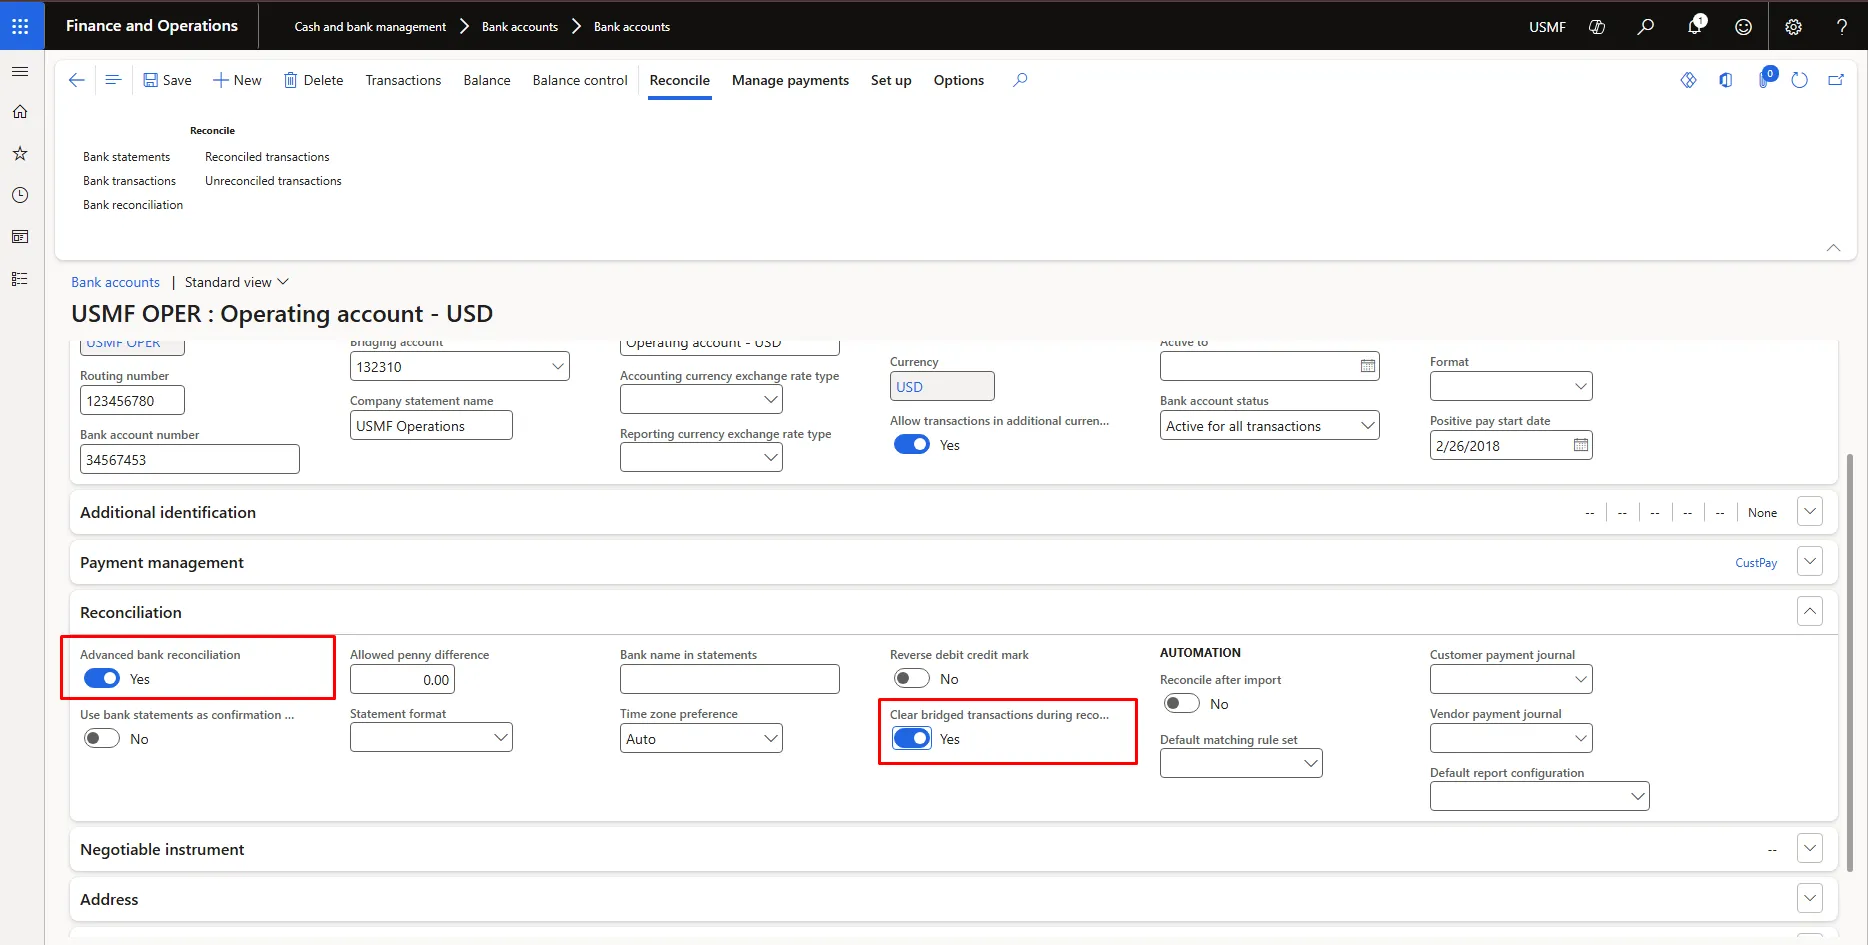
- Bank account — (Cash and bank management > Bank accounts > select the paying bank account > Edit > Reconciliation section.) Set Advanced bank reconciliation = Yes and Clear bridged transactions during reconciliation = Yes. Both are required — the second is the specific switch that lets this bank account’s bridged transactions be cleared during reconciliation at all.
- Bridging account by bank account — This toggle sits on the method of payment, in the Posting group alongside Bridging posting. It controls which setup owns the bridging account: left at No, the account is read from the method of payment; set to Yes, it is read from the Bridging account field on the bank account instead. It was left at No for this test because both point to the same account, 132310 (Figure 3 and Figure 4), so the posting result is identical either way. Turn it on when one method of payment is shared across several bank accounts that each need their own bridging account, which avoids creating a separate method of payment per bank.
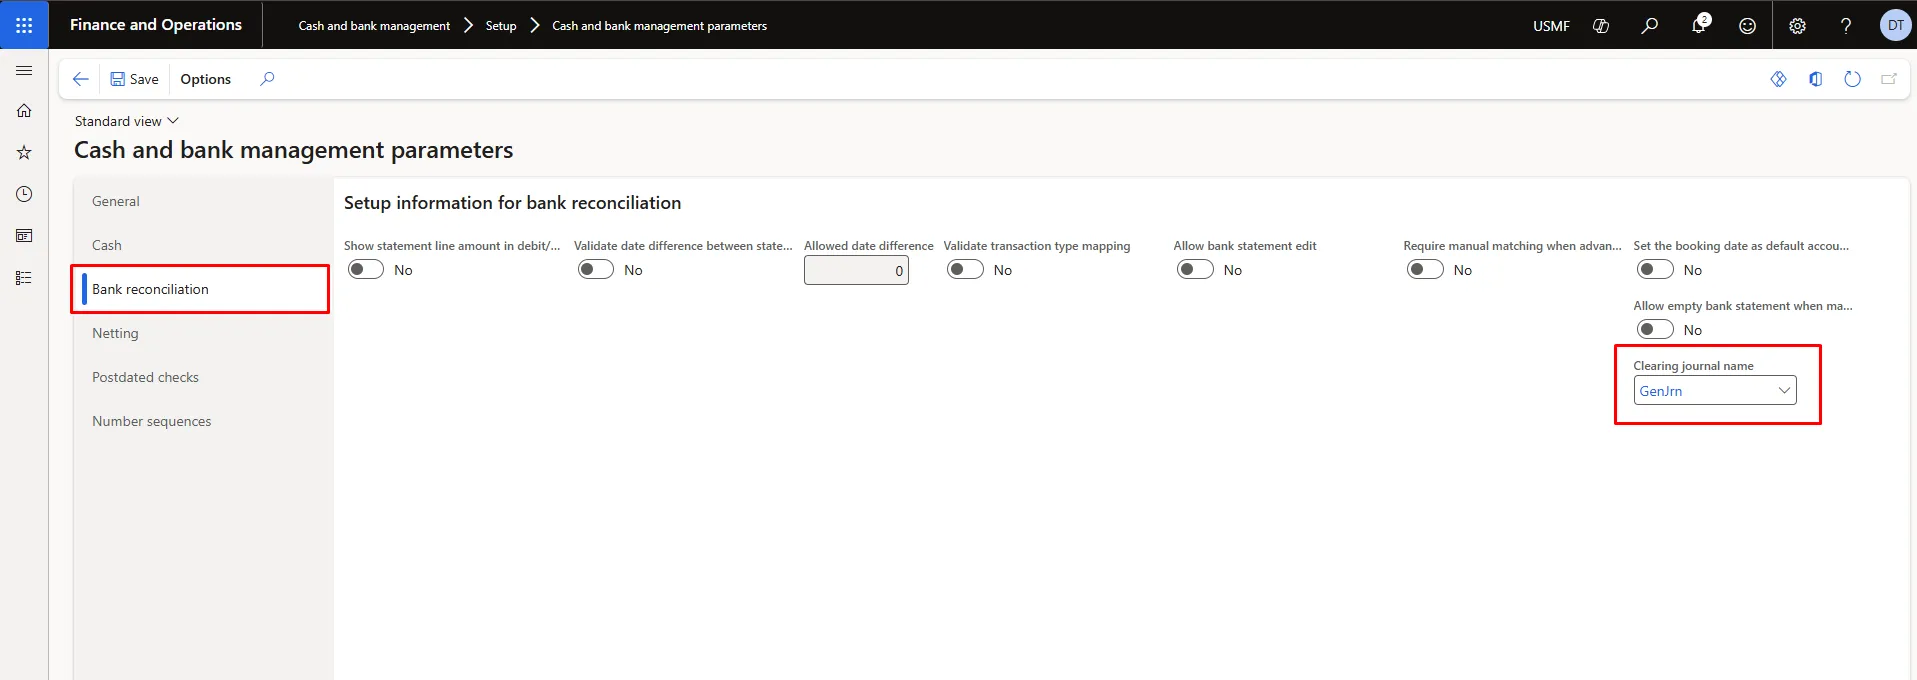
- Clearing journal name — Cash and bank management > Setup > Cash and bank management parameters > Bank reconciliation tab. This is mandatory: it names the general journal the automatic clearing voucher is posted into. If it is left blank, the clearing job has nowhere to post and the auto-clear will not complete. GenJrn was used here for the sandbox test; production setups typically use a dedicated journal name so that auto-posted clearing entries stay separate from manual journal activity.
Step 4: Post the Centralized Vendor Payment
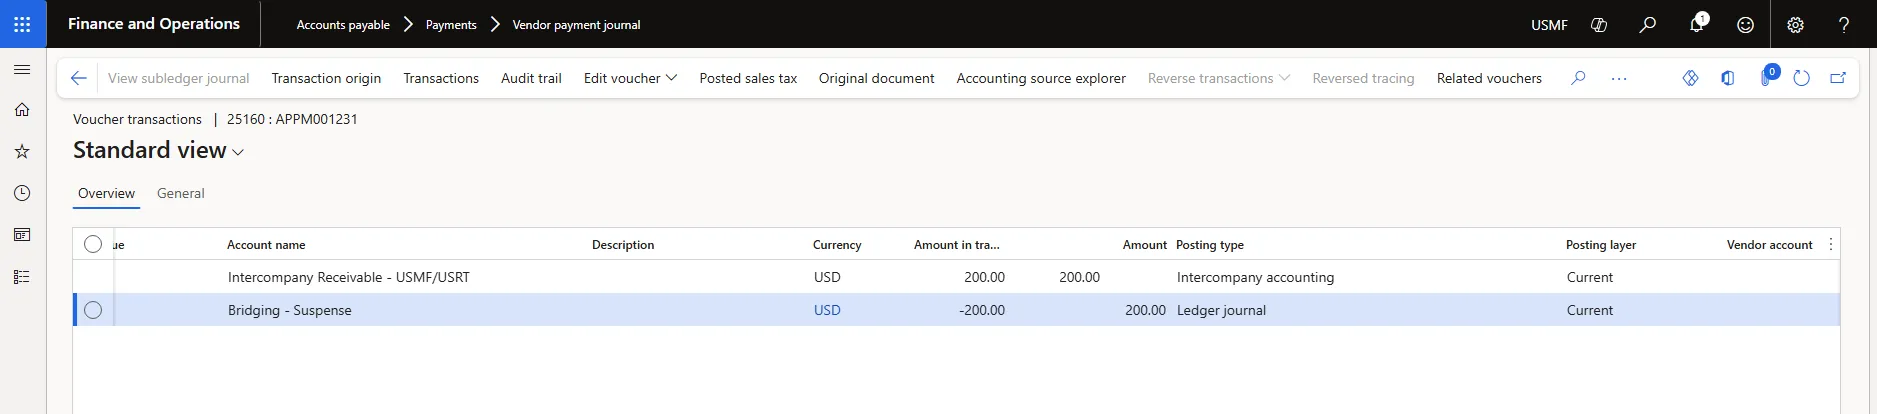
With setup complete, a normal vendor payment journal is enough to generate the test scenario — no special transaction type is required. In USMF, a payment journal line was created against a USRT vendor invoice, using the BRIDGING method of payment, then settled against the open invoice and posted.
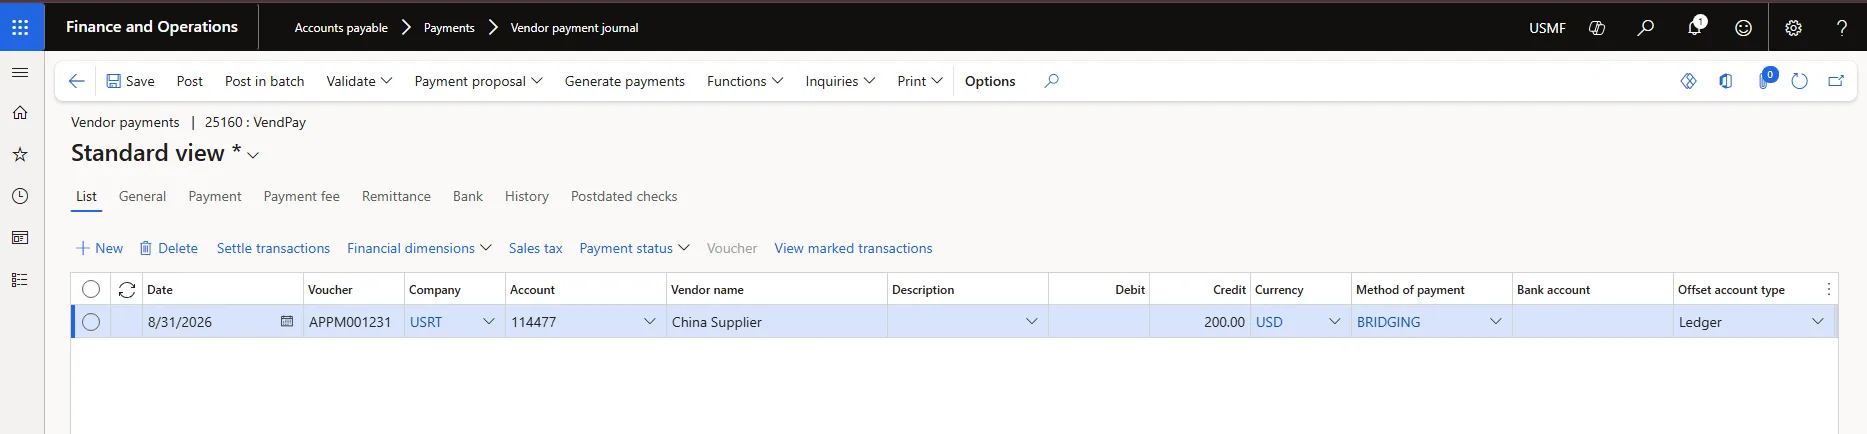
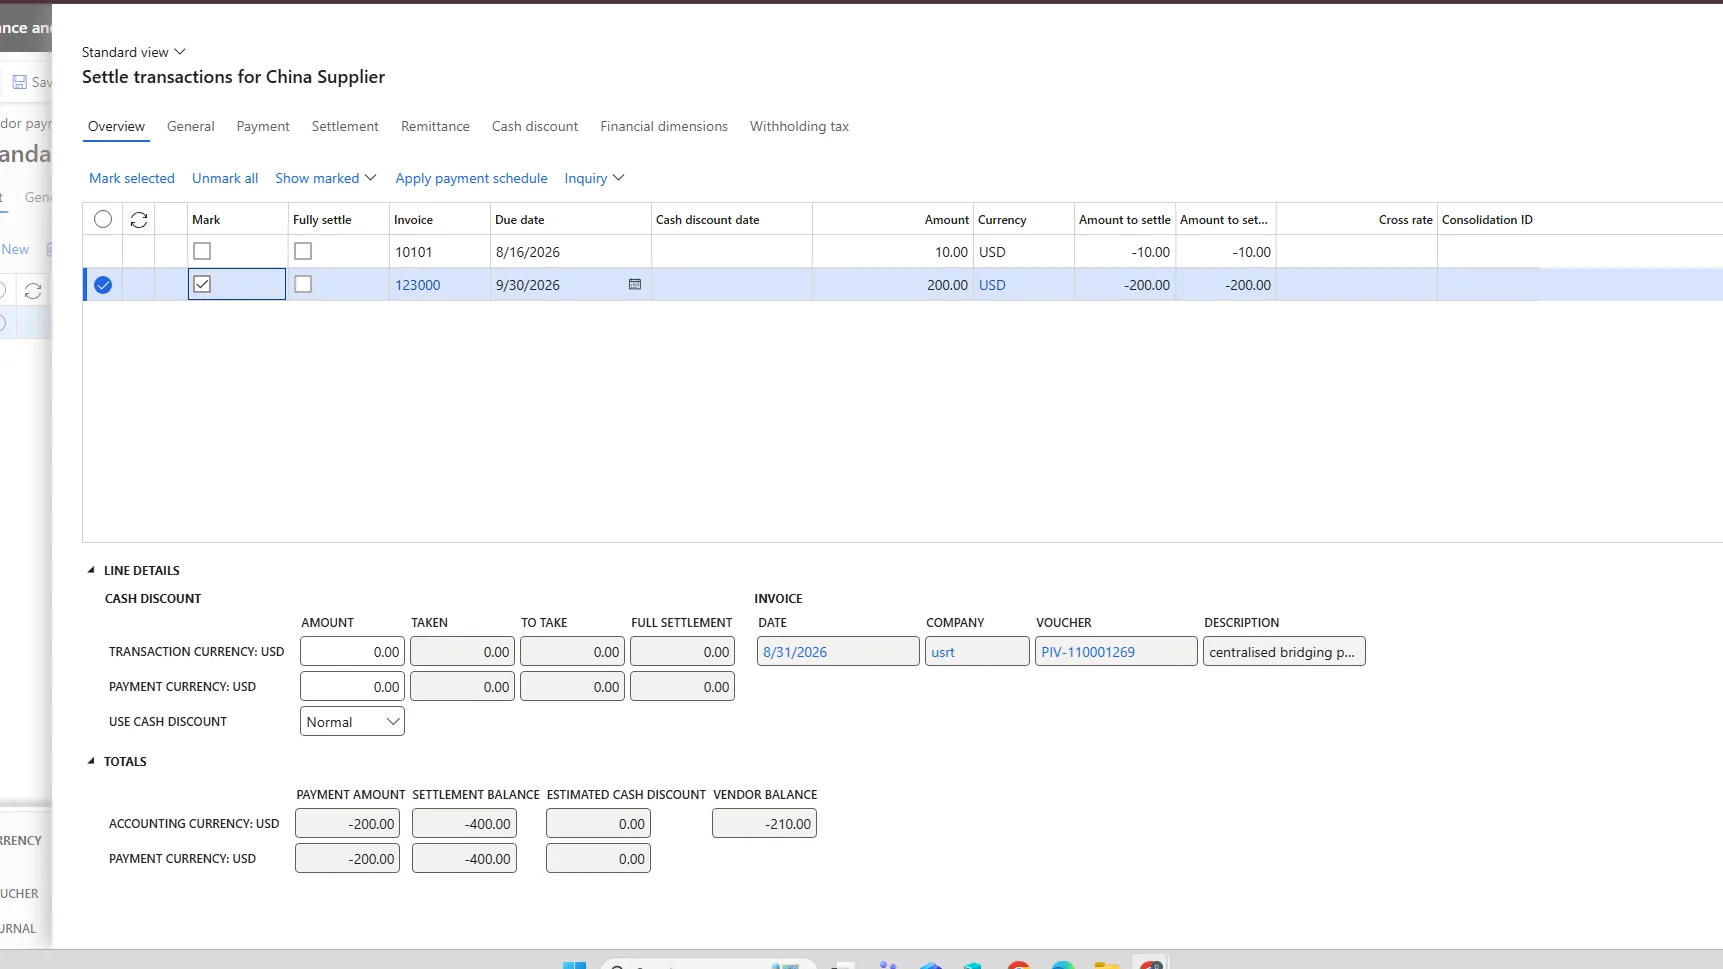
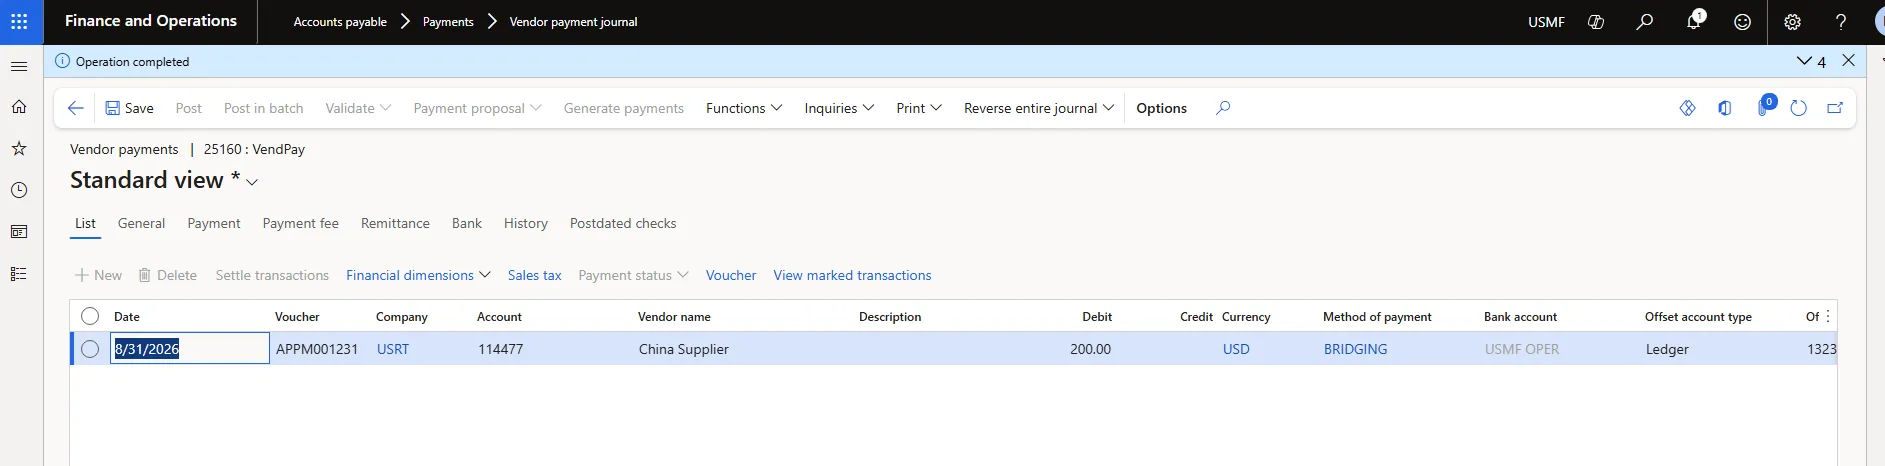
Checking the posted voucher confirms the bridge mechanism worked as designed: the payment did not hit the bank account. It hit the bridging/suspense account instead, with the offsetting entry landing on Intercompany Receivable.
Step 5: Run Bank Reconciliation
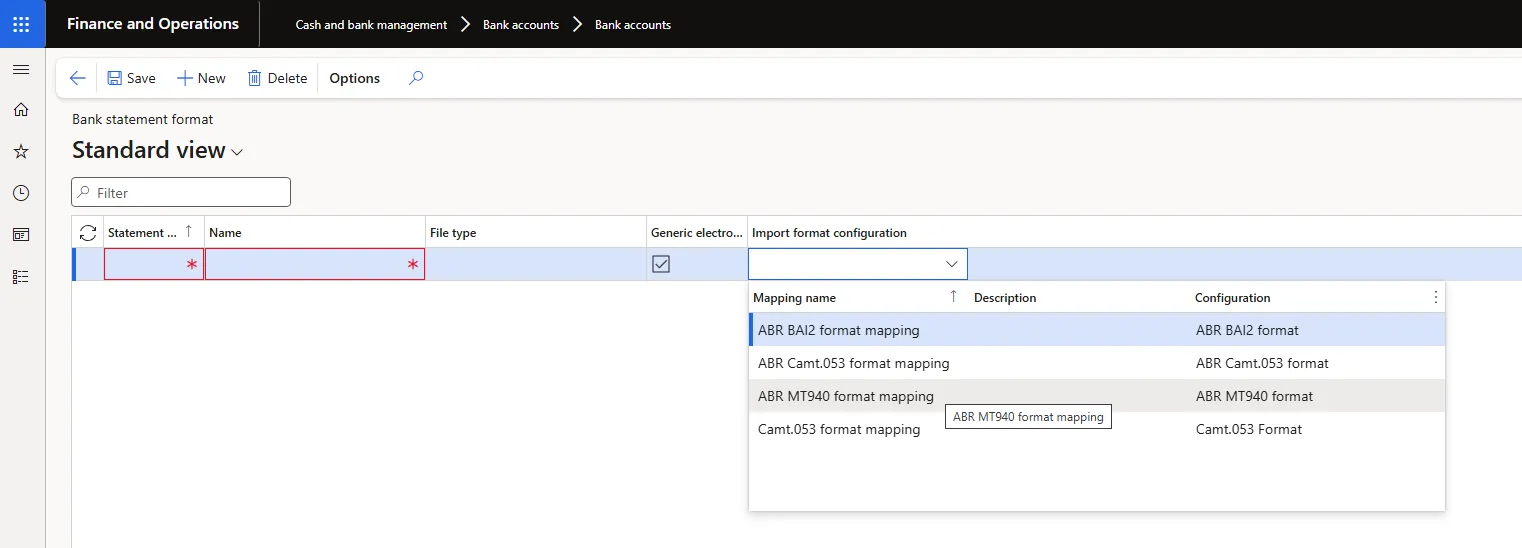
With no live bank feed in the sandbox, a test MT940 statement was built and imported to represent the bank clearing the payment. This required registering an MT940 statement format (Cash and bank management > Setup > Advanced bank reconciliation setup > Bank statement format) against the existing “ABR MT940 format mapping,” then assigning it to the bank account’s Statement format field.
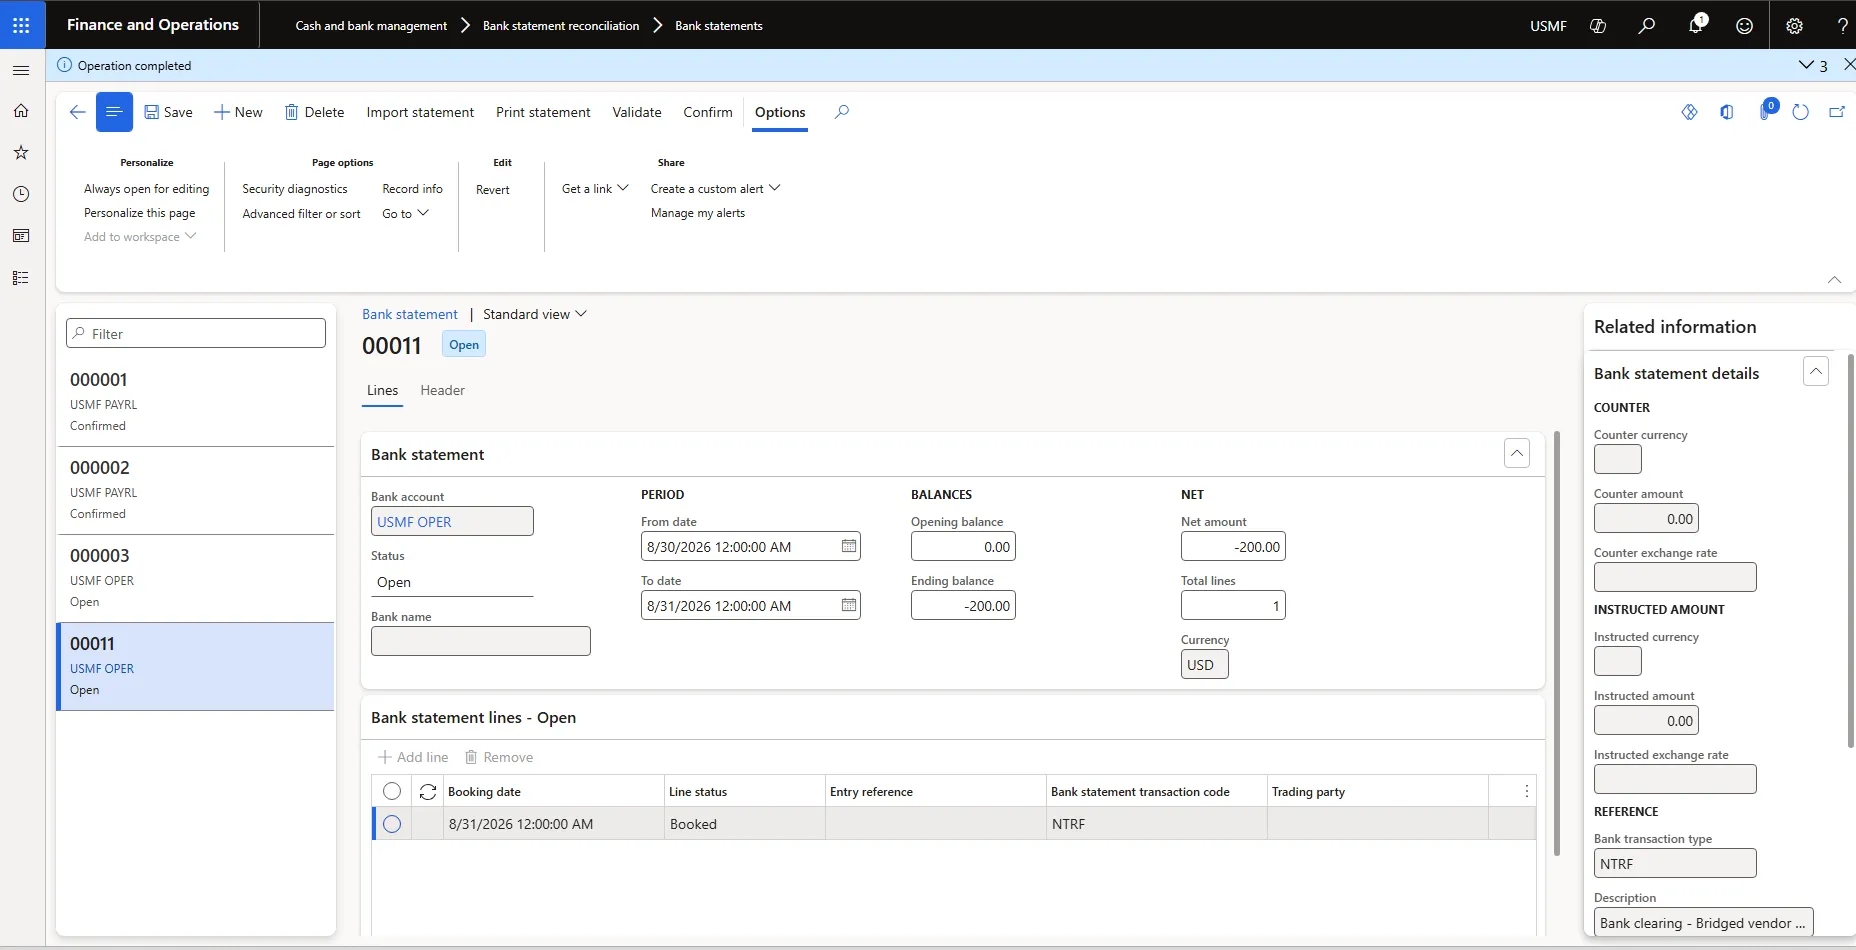
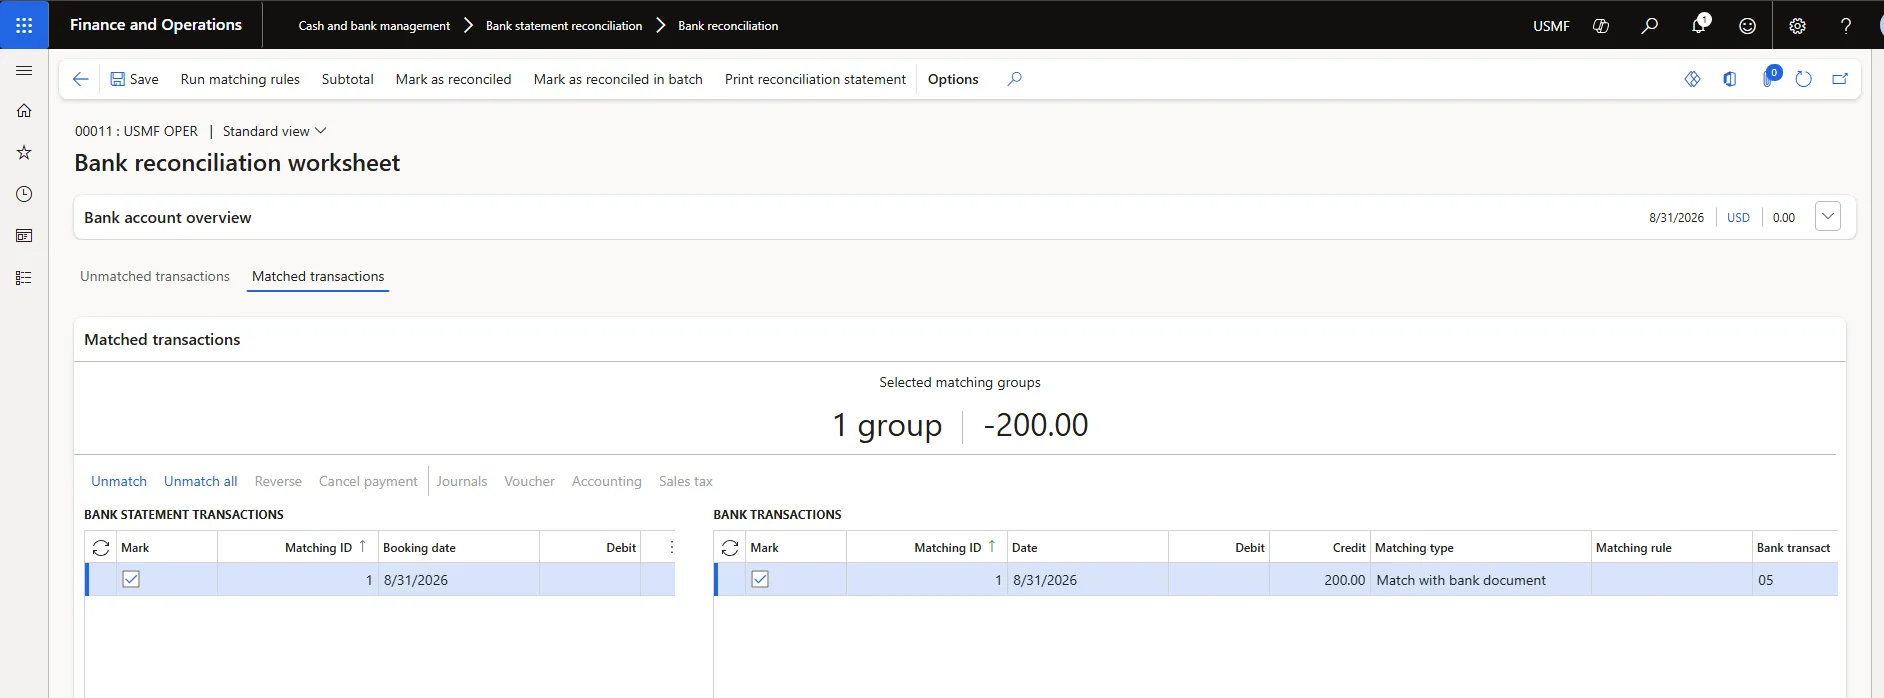
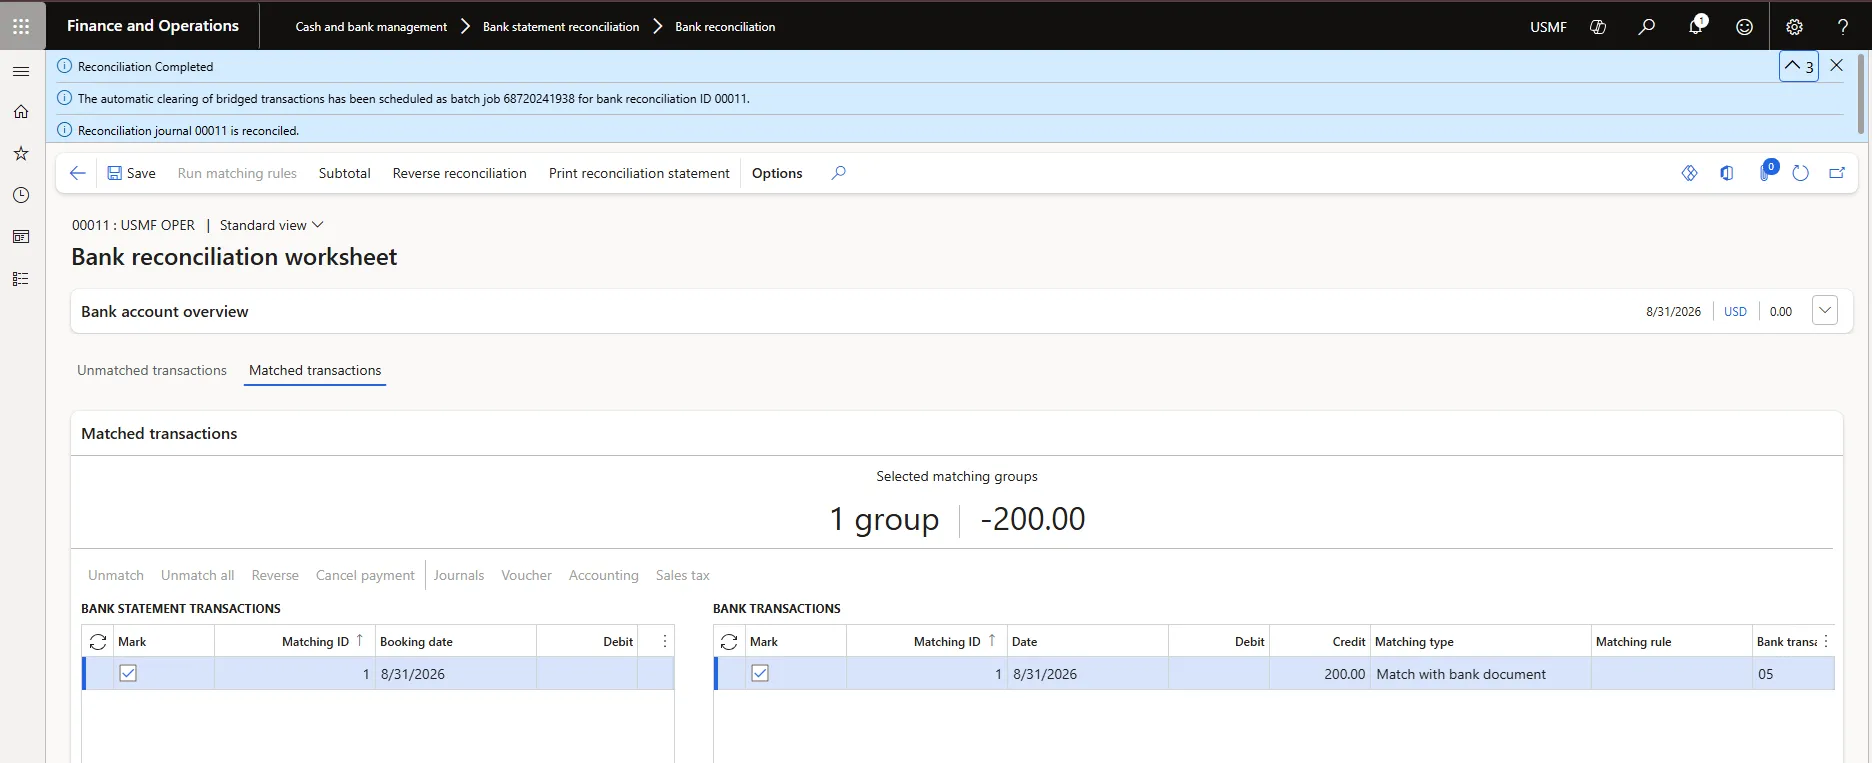
Once confirmed, the statement line flowed straight into the open bank reconciliation worksheet and matched cleanly against the bridge transaction.
The Result: Auto-Clear Fires
Selecting the matched group and choosing Mark as reconciled triggered the feature immediately, confirmed by the system’s own message:
“The automatic clearing of bridged transactions has been scheduled as batch job 68720241938 for bank reconciliation ID 00011.” — “Reconciliation journal 00011 is reconciled.”
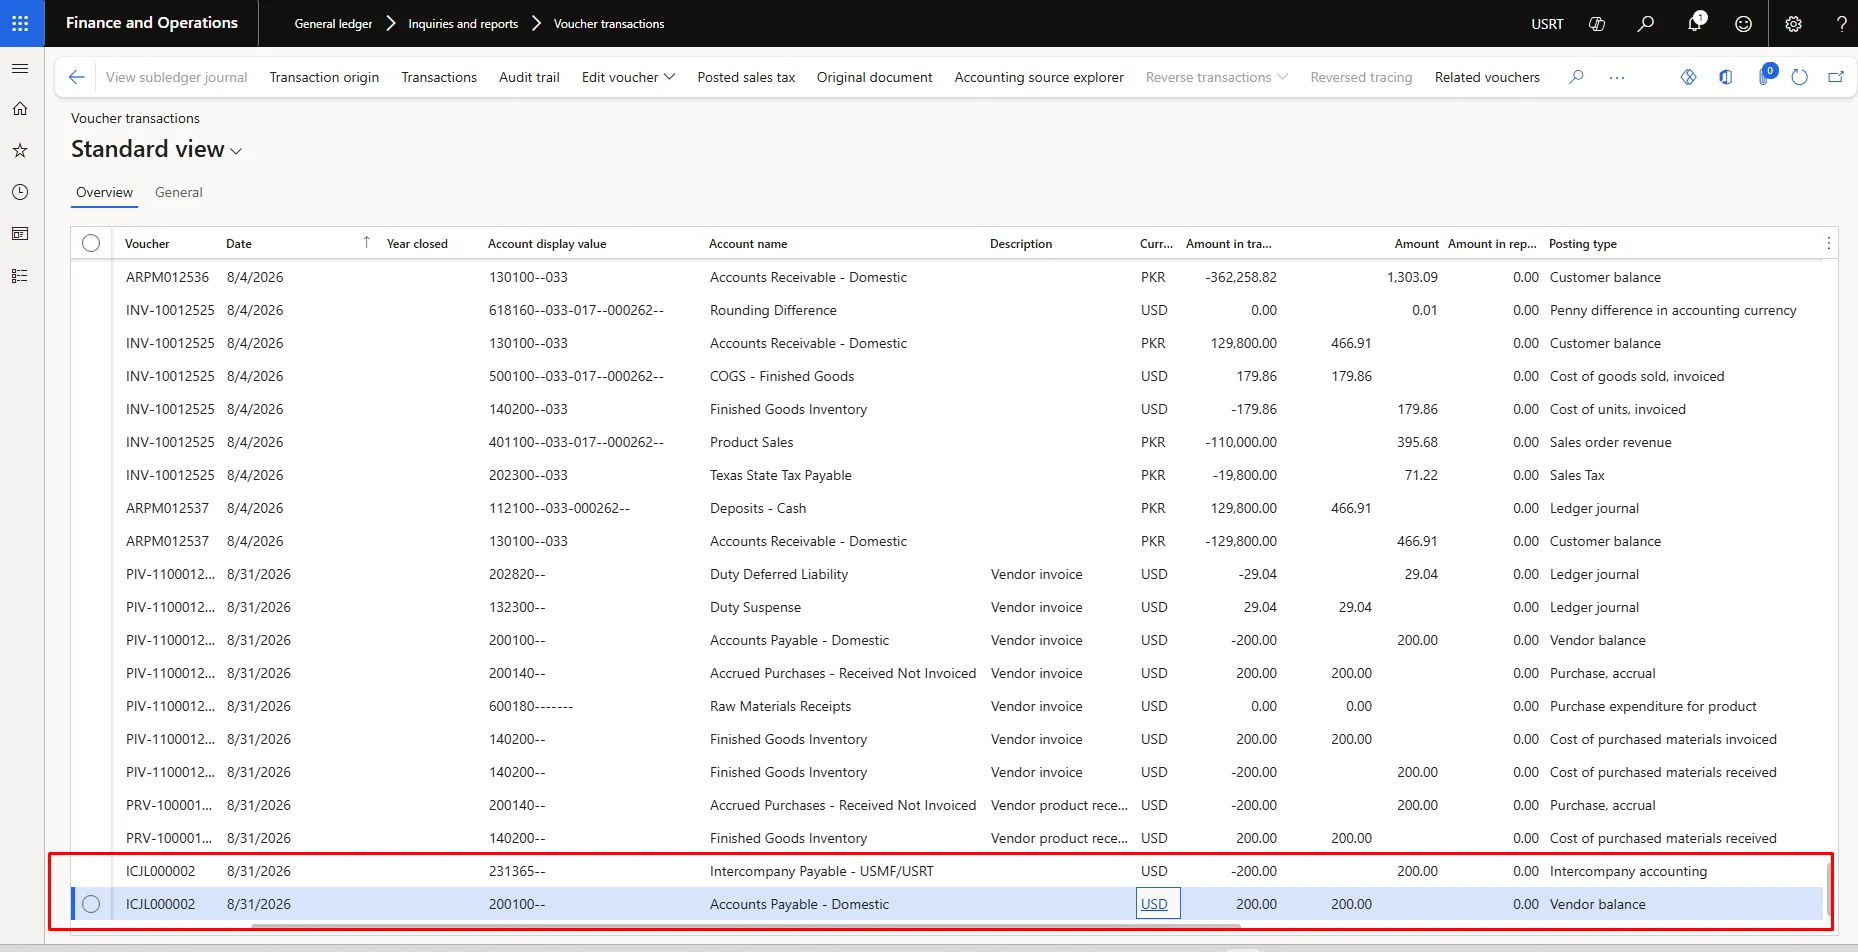
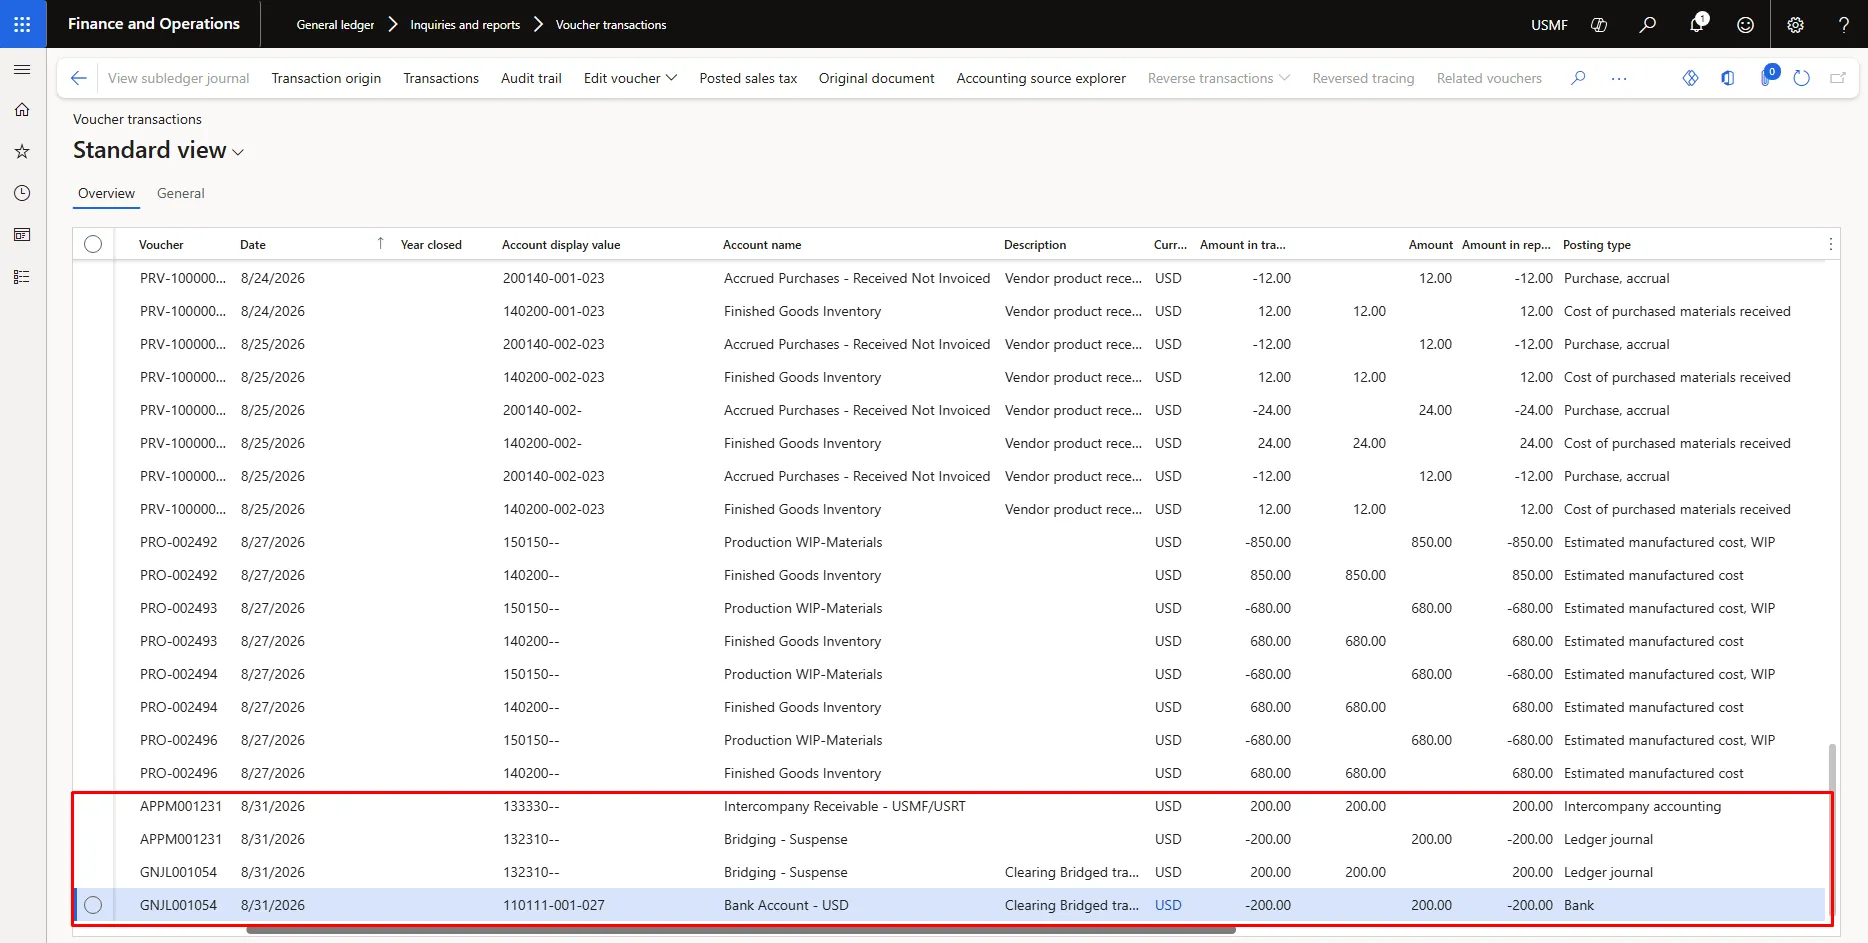
Once the batch job completed, the clearing voucher was posted automatically, with zero manual journal entry. Microsoft posts the clearing journal only in the centralized payment legal entity, so GNJL001054 in USMF (Figure 15) is the sole voucher created by this feature. Figure 14 is shown alongside it for context: the USRT intercompany voucher was created earlier, when the payment was posted in Step 4, and is the standard centralized-payment due-to/due-from entry rather than output of the auto-clear batch.
Why This Matters
Before this feature, clearing a centralized bridged payment required a cash clerk to remember the bridge existed, identify which legal entity to post the clearing journal in, and enter it manually — a step that scales poorly and is easy to miss at period close. With the feature enabled, the trigger is simply marking the bank reconciliation as reconciled. The system already knows which legal entity is centralized, which account is the bridge, and which account is the real bank — because that information was set up once, at configuration time, not re-decided at transaction time.
For multi-entity organizations running centralized payments, this removes a recurring manual step from every period close, tightens the audit trail between legal entities, and reduces the risk of an unreconciled bridge balance sitting unnoticed on the books.
About the author
As a Functional Consultant, I work on implementing and fine-tuning Dynamics 365 Finance and Supply Chain modules. I'm passionate about helping organizations turn system capabilities into smarter, smoother business operations.
The views and analysis expressed in this article are those of the author and are based on their professional experience and research. They do not necessarily represent the views of Devsinc.